ASP.Net Core Hello World on Raspberry Pi
Overview
In a previous post I showed you how to install the .Net Core 2.0 on a Raspberry Pi running Raspbian so that you could run dotnet Core applications on this wonderful device. We didn't really run any applications in the previous post but we did prove that the dotnet core was installed properly. In this post I will walk you through creating an ASP.Net Core 2.0 Hello World Web Application and deploy it onto the Raspberry Pi. You will create this project on your developer machine and target the ARM processor for deployment to a Raspberry Pi. This post will only cover doing this on a Windows machine.
Setup
You are going to need to make sure you have the .Net Core SDK on your developer workstation before you write some code. Well I don't need to show you how to do that on my blog as it has already been done here. So stop procrastinating and get it installed.
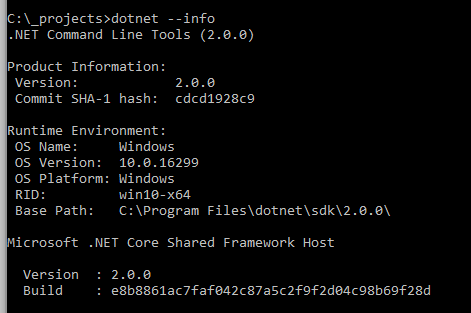
Just to double check that the .Net Core 2.0 SDK is installed open up a comman prompt and execute the following:
dotnet --info
You should see something like the following output:
Create the Web App
Back on your developer workstation in that CMD prompt, create a new directory to hold your web application.
mkdir hello-world Then jump into that new directory.
cd hello-world Then create a new web application.
dotnet new web This created a simple web application that we can test on our developer workstation to make sure it works.
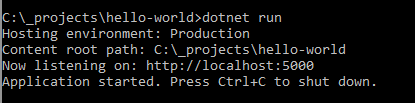
dotnet run
You should see something like the following output:
Go ahead I know you are dying to open up a browser and navigate to http://localhost:5000 and see this new start of the art application!
You should see something like the following:
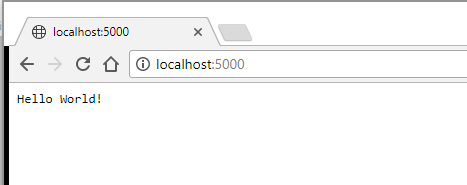
Ok this is pretty bare bones but I did say we were going to create a hello world web application. But wait the real fun part is getting this to run on the Raspberry Pi. Go ahead and kill the development web server in the CMD prompt using Ctrl+C. First we need to change the code so that it will bind to more IP addresses then the localhost one. Edit the Program.cs class and change the following to add the UseKestrel and telling the web server to listen on all IP Addresses:
       public static IWebHost BuildWebHost(string[] args) =>
            WebHost.CreateDefaultBuilder(args)
                .UseStartup()
                .UseKestrel(options =>
                {
                    options.Listen(IPAddress.Any,5000);
                })
                .Build();
Now lets publish this web application to a linux ARM platform.
dotnet publish -r linux-arm
The output of this commend looks something like this:

This command generated all the files you need to copy over to the Raspberry Pi. This is where you need to figure out the best way to copy the files to the Raspberry Pi. One way to do this is to run an FTP server on the Pi and open up a FTP client (such as FileZilla) on your developer workstation and upload the files. I like to use the Python library called pyftpdlib as it allows you to serve up files in any folder on the Pi and it is a temporary FTP server. I didn't really want to focus this post on setting up an FTP server so I thought using this library will be the path of least resistance. I am going to assume you already know how to SSH into your Raspberry Pi with something like Putty so go ahead and do that.
On the Raspberry Pi install the python FTP library.
pip install pyftpdlib
Once the library is installed you need create a folder on the Raspberry Pi that will hold the hello-world web application. On the Raspberry Pi issue the follwoing command:
mkdir hello-world
Then navigate into that directory
cd hello-world
Then start up the FTP server so we can upload the files. On the Raspberry Pi execute the following command.
python -m pyftpdlib -w
On your developer workstation start up your favorite FTP client (such as FillZilla) and connect to the Raspberry Pi using anonymous/anonymous as the useranme/password. Upload the files located in bin\debug\netcoreapp2.0\linux-arm\publish folder to the Raspberry Pi.
Once the files are uploaded you can stop the FTP server on the Pi by using Ctrl+C in the SHH terminal. Next we need to set the right permissions on the executable. Execute the follwing command on the Raspberry Pi.
chmod 755 hello-world
Now lets execute the application to serve up the files, so execute the following on teh Raspberry Pi:
./hello-world
The program should start up and let you know the port it is serving the web site on.
Open up a browser on your developer workstation and put in http://x.x.x.x:5000 where x.x.x.x is the IP address of your Raspberry Pi. You should see the hello-world web application in your browser.
Conclusion
As you can see it is pretty easy to create a web application on your development machine and target the linux-arm platform so that the application can be copied over to the Raspberry Pi and executed. We only did a simple web application but you can also create an mvc application and expose a Web API from the Pi. Just execute the following:
dotnet new mvc
Next up I will look into remotely debugging an application from your developer workstation on the Raspberry Pi.
