How to build a Maze Robot
Overview
The following article was originally posted by me on the Phoenix Area Robotics eXperimenters web site. I moved the article here on my blog as I no longer belong to the Robotics group. You can find the original article on the PAReX site.
Building a Maze Robot
My maze robot DR X took first place in BotBash’s 2000 Autonomous Maze competition. The competition consisted of three mazes with different configurations. The robot that completed all three mazes in the shortest time wins the event. Each robot had five chances to complete all three mazes. The shortest three times where summed up for the final score. DR X was the only robot able to complete all three mazes in the allotted time frame. This article was written as an attempt to explain the techniques used to allow DR X to accomplish first place.
There are several techniques that can be used in solving mazes:
- Random
- Wall Following
- Mapping
Random navigation does not seem like a very elegant way to master a maze so my choices were mapping or wall following algorithms. Mapping a maze can be very difficult to do and this competition did not really reward such a task. So that leaves wall following as the best bet to complete the maze.
Wall following can be best explained by imagining yourself in a maze with your eyes closed. If you could place one hand on a wall and never let the hand leave the wall you will eventually find the end of the maze as long as the finish is not an island in the middle of the maze. It is very important to follow only one wall until you reach the end.
The following drawings show right and left wall following paths for a given maze.

Notice that in some cases it is better to choose one wall to follow over another. Here the shortest path from start (S) to finish (F) is via the right wall. So it is good practice to be able to command your robot to follow one wall over another before it is set in the start box. This can be accomplished by using the left and right bumper switches. Tapping the left or right switch before the start commands the robot to follow the left or right wall.
So I set out to build and program a maze robot to follow one wall. I choose to use a differential drive system on a round body. This would allow me to control the robot rather easily and prevent it from getting hung up on maze walls. I mounted two GP2D02 IR Sensors on a single shaft on top of a servomotor. The sensors were positioned 90 degrees apart. The servomotor allowed the robot to look straight ahead and the left or right wall at the same time.
DR X First Prototype
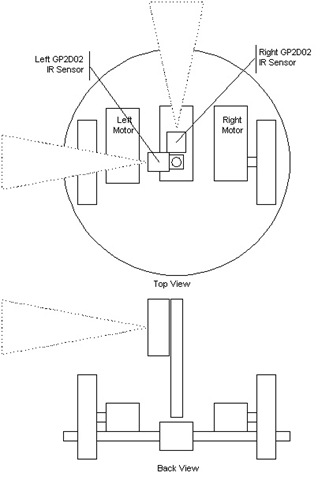
In order to tell if the robot was getting closer or further away from a wall a minimum of two sensor readings would have to be taken over a period of time while the robot was moving. I had some difficulty in fine-tuning the reactions needed to prevent the robot from touching the walls. I quickly realized that this sensor arrangement had some shortcomings. I needed to be able to look at a wall and determine if the robot was parallel to it without moving forward. If I could achieve this, the robot would always start off parallel to a given wall. So I made some sensor placement changes that would not require the robot to be moving in order to determine if it was parallel or not.
DR X Second Prototype
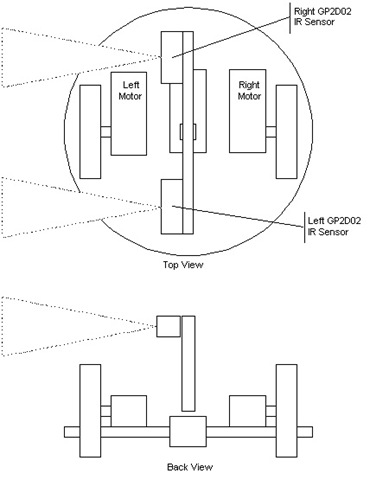
I found out some other advantages of this sensor arrangement. While the robot was following a wall and it approached a doorway of the maze the first sensor would detect the opening (doorway) very easily. Once the second sensor detected the doorway I knew the robot was directly in front of the entranceway. A 90 degree turn towards the entranceway would position the robot perfectly for passage through the door. Passage through the door would also be easily detected. As the robot moved forward, the door jam could be detected by both sensors. The robot could successfully determine when a door was found and navigate through the door rather easily.
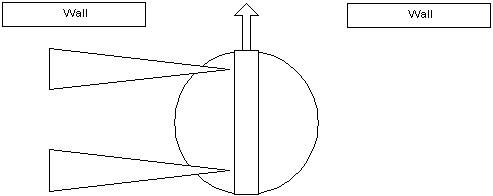
The following drawings show the robot navigating through a doorway.
The robot approaches the doorway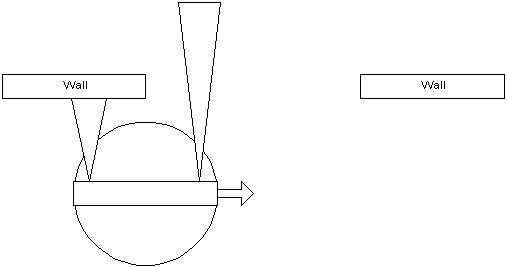
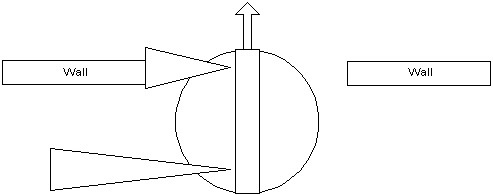
The robot passes the doorway
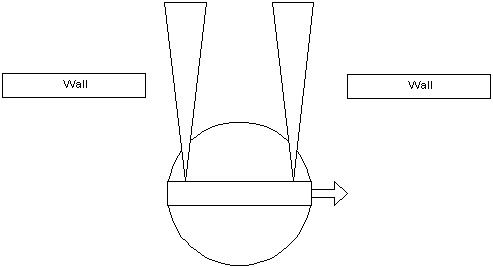
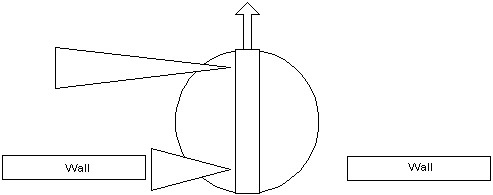
The robot turns left 90 degrees
The robot moves forward into the doorway
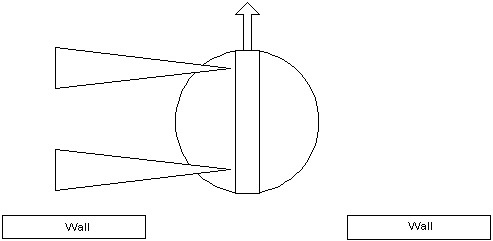
The robot is almost through the doorway.
The robot is through the doorway.
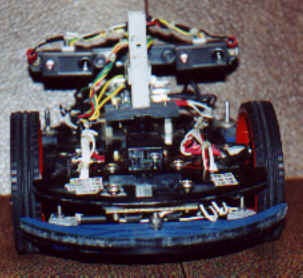
DR X Front View
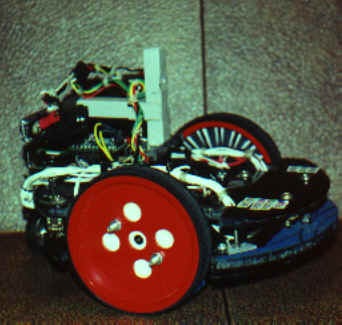
DR X Side View
Improvements
Well this solution certainly has room for improvement and it is not the only way to solve a maze. One major enhancement that I saw was DR X needed a sensor that could look in front of the robot while it was attempting to follow a wall. This would have prevented the robot from having to collide with a wall before it realized it needed to stop and turn.
Conclusions
Well this project sure was a gratifying experience. To watch my little creation navigate the maze was a great thrill. A lot of last minute hard work went into this robot but come event day it all paid off.